KatFS Alpha Devlog #7 (January 2025)
Hello all! Time for the first proper alpha devlog of 2025! January has started strong for KatFS (or so I feel), with a new process for designing and spriting game assets which has made the whole process of asset creation a lot quicker and more pleasant. It was touched upon briefly in the last devlog when I was first experimenting with it, and now with half a month of applying said method I can talk about it more in depth!
Alright, enough suspense, what is the method again? Oh yeah, 3D to 2D pipeline:
THE OTHER WAY AROUND
Nowadays when people think about art asset pipelines in games, they're more likely to imagine a sequence of 2D concept -> 3D asset (or 2D concept -> 2D asset for 2D games). At face value, the idea of "downgrading" a 3D mesh to a 2D sprite seems counter-intuitive - why go through the trouble of modelling something in 3D if it's just gonna get redrawn as a fixed raster image afterward?
Well it's more useful than you may think! I obviously do not claim this to be a revolutionary or unique aspect of KatFS's development, but it is something that might seem odd at first to a non or newbie gamedev audience. Games have always done 3D -> 2D, heck it was the industry standard before proper 3D games became a thing!
So, let's go through the process for KatFS!
SETTING UP THE SCENE
The first step in setting up a 3D to 2D pipeline is to make sure your 3D scene is aligned with how your 2D game is presented. Is the game in question top-down, or isometric, or a side-scroller? Not only you must match the angle, but also the perspective in the game. You'll probably also want to set your render camera to orthographic mode as well.
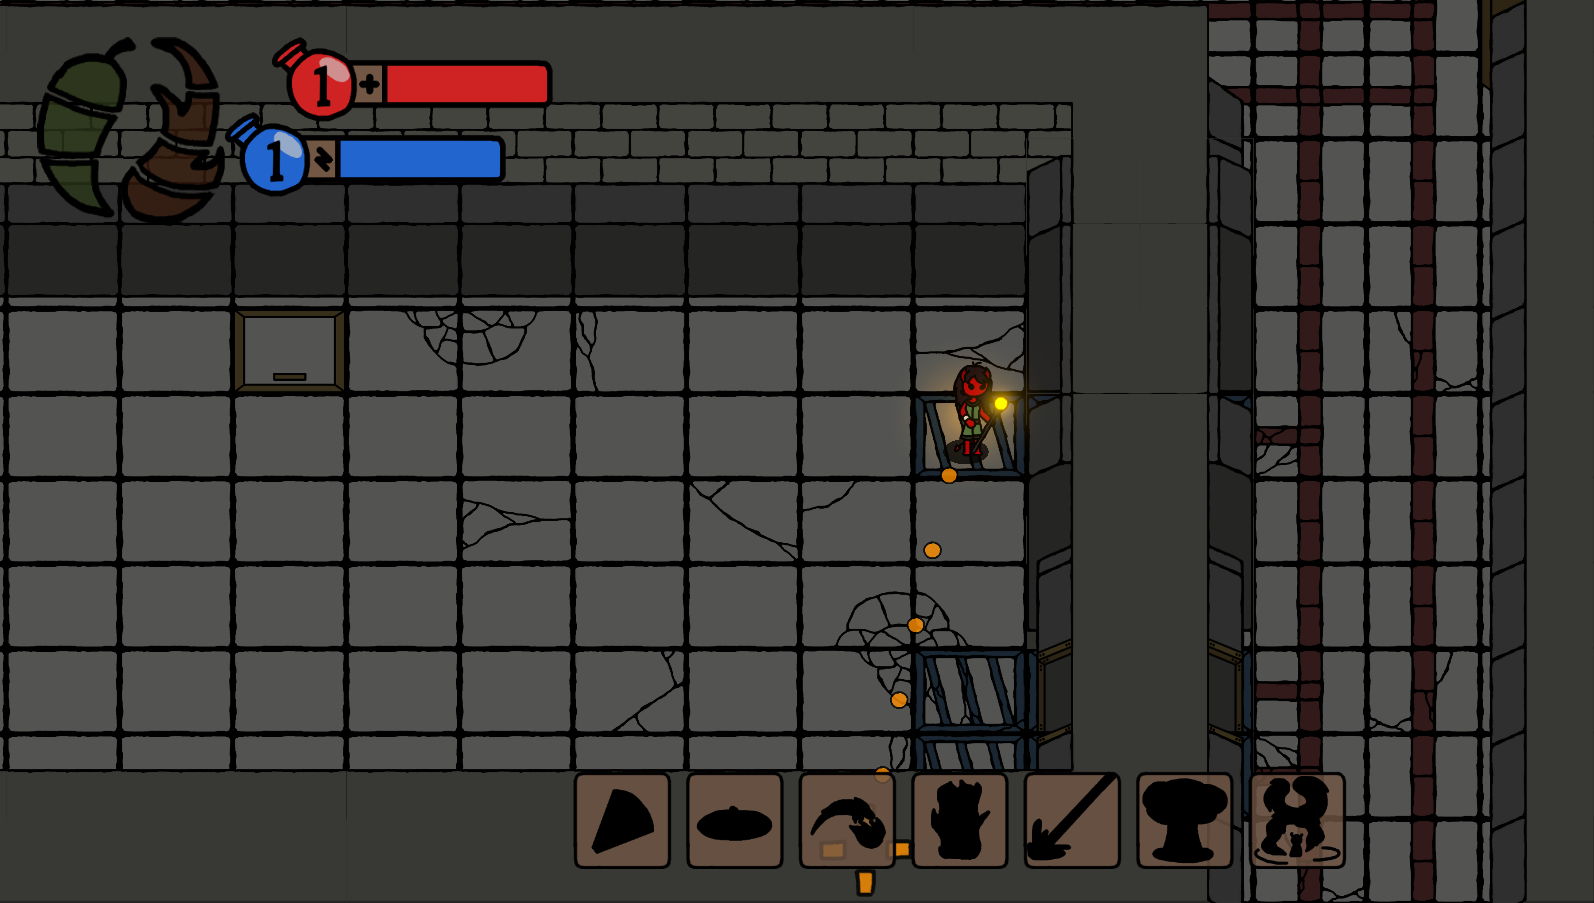
KatFS is presented top-down at an angle. As an universal rule for the game's perspective, the ground grid maintains a consistent 4:3 aspect ratio, meaning North-South directions appear slightly shorter than West-East. This is better visualized with a screenshot of the game, noting the floor tiles:
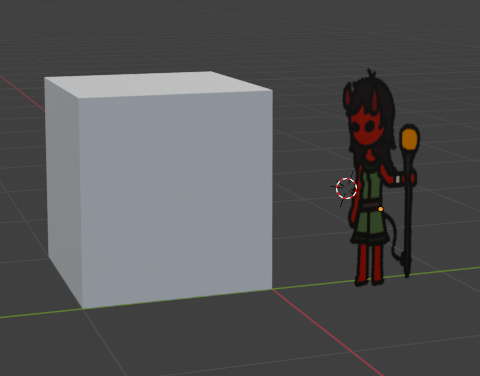
However, when presenting height (that is, the vertical aspect of the in-game world as opposed to North-South and West-East), things get a little bit more interesting. A vertical element should take up one grid square for each "unit" of height plus an extra square for the top face. This is better visualized with these blocky walls I made for testing at an early stage of this process: they're supposed to be 2 units high, and thus take up 3 grid squares.

So, with these rules set, the goal then became to find a combination of camera angle and object dimensions that would match these proportions. After experimenting a lot in Blender, these were the configurations that worked for me:
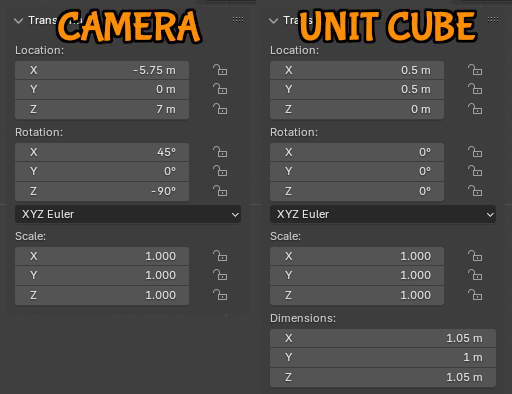
Getting the proportions to match with orthographic angle alone was proving a bit too difficult, so I figured out a little "cheat" by bumping up the height and depth of the "unit cube" to 1.05 units. This means that if I want to design an object that would be 2 units high in-game, it needs to be 2.1 units high in Blender.
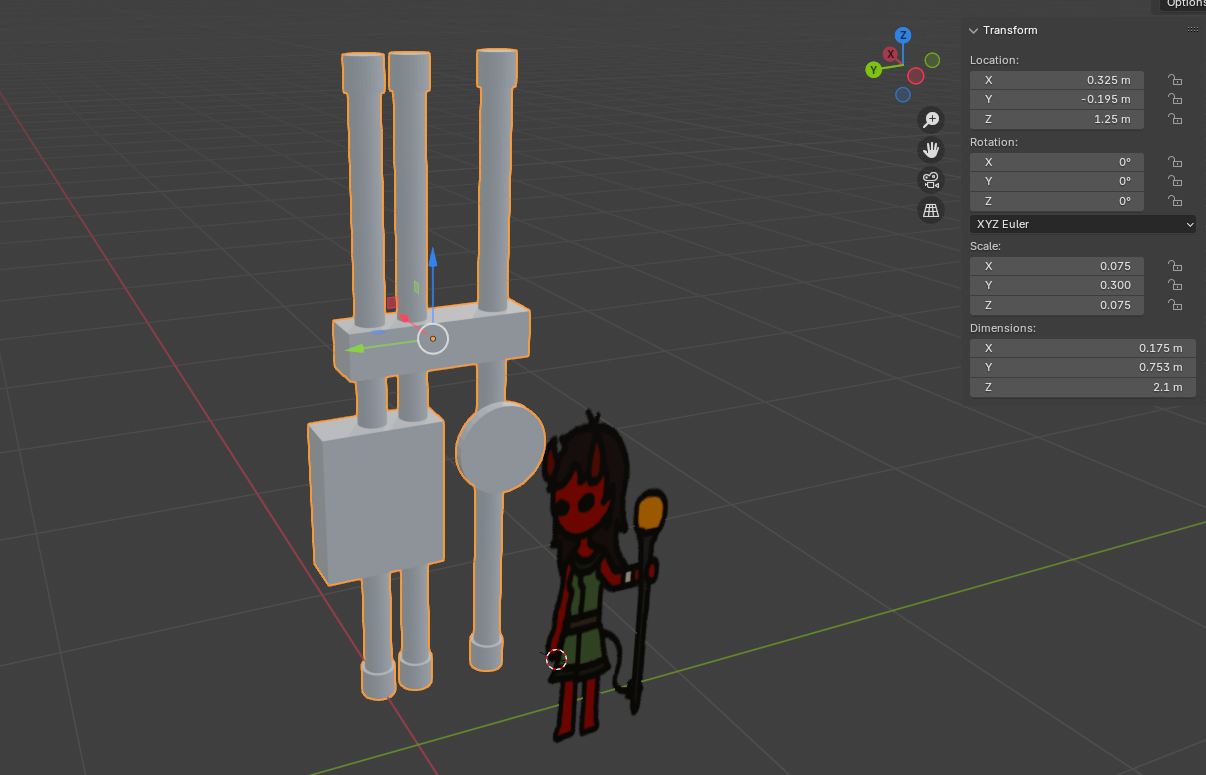
Oh, and make sure to include a size reference object in your 3D scene! Obviously I had to use Kalia.
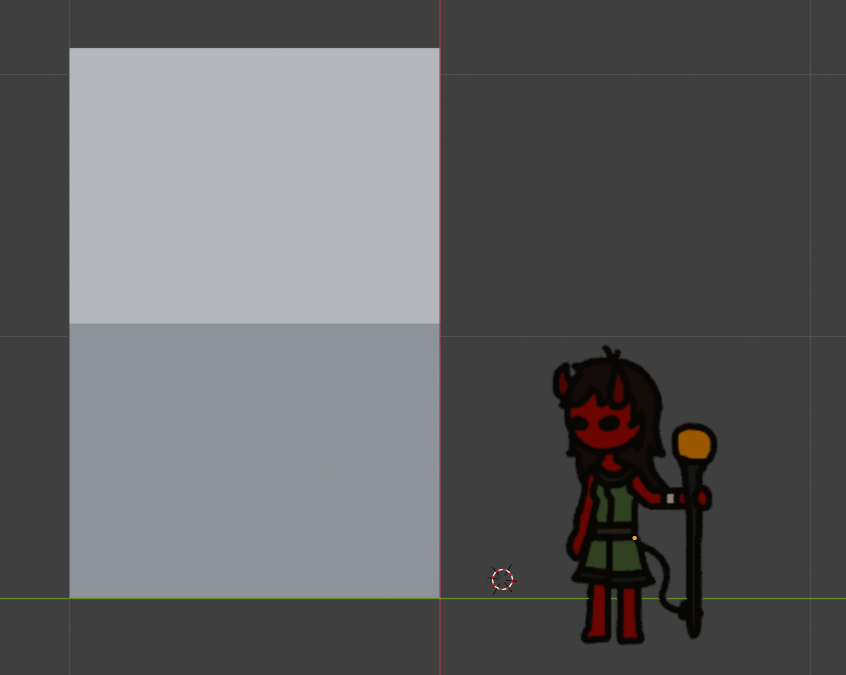
Since this is being rendered at an angle, she had to be stretched a bit in the scene to match her in-game appearance. I suppose that helps give an idea of her actual perceived size in the game's environment:
Additionally, I've worked out the exact orthographic camera size in order to match the game's pixel scale, meaning I can take the output image straight to the editor and begin tracing over without needing to first resize it to scale. For larger objects that might require a zoomed out view, I can simply multiply the ortho size and resize by a whole factor rather than needing to calculate the exact percentage that will match the images.
So, the scene is set, proportions are set, onto creating!
CREATING A SIMPLE ASSET
Let's create a new asset then! So what is creating assets with this process like? Well, it starts like any other process, with some inspirations and references. Right now, I'm creating assets that will populate the game's "Facility" chapter, which is a gigantic ancient building filled with magical machinery, like a manufacturing plant. It is where the ancient denizens of this town took their refined magical crystals and used them to produce all sorts of artifacts and also power their city, so we'll be looking at references from real life factories and power plants, filtered through a lens of ancient civilizations like the Aztecs and Mayans, which have been the main reference for the game's setting.
For this example asset in particular, I envisioned some sort of wall control panel. Somewhere that the long gone workers of this place would go to check on a steam pipe pressure or if the magical energy lenses are calibrated properly, or any other jargon that would fit. So I pictured it, a set of pipes that would run along a wall, with a valve and a control panel. Onto Blender!
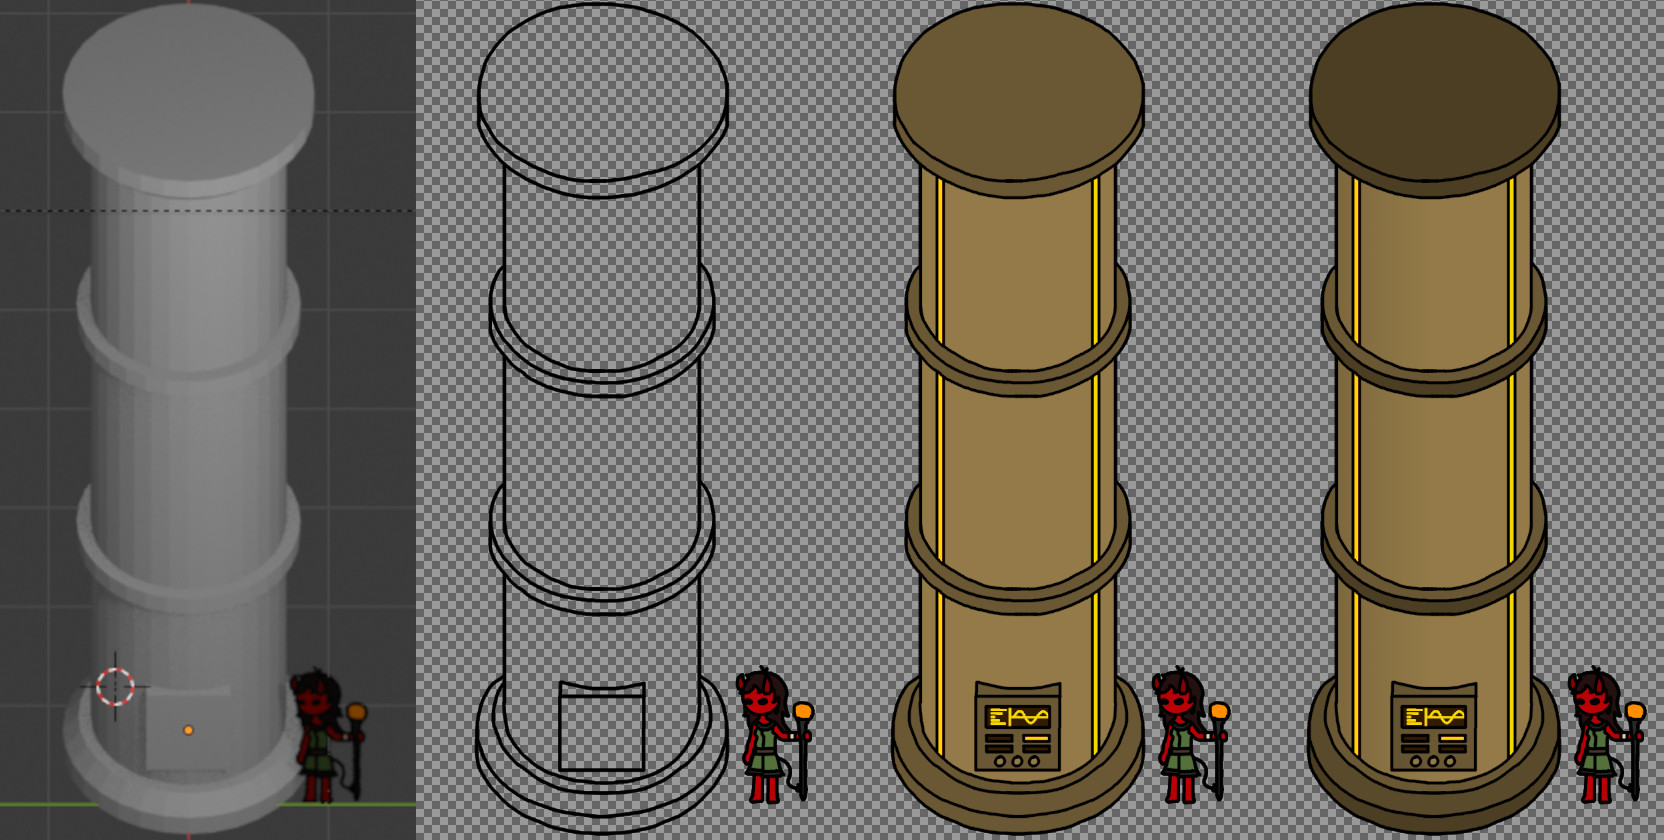
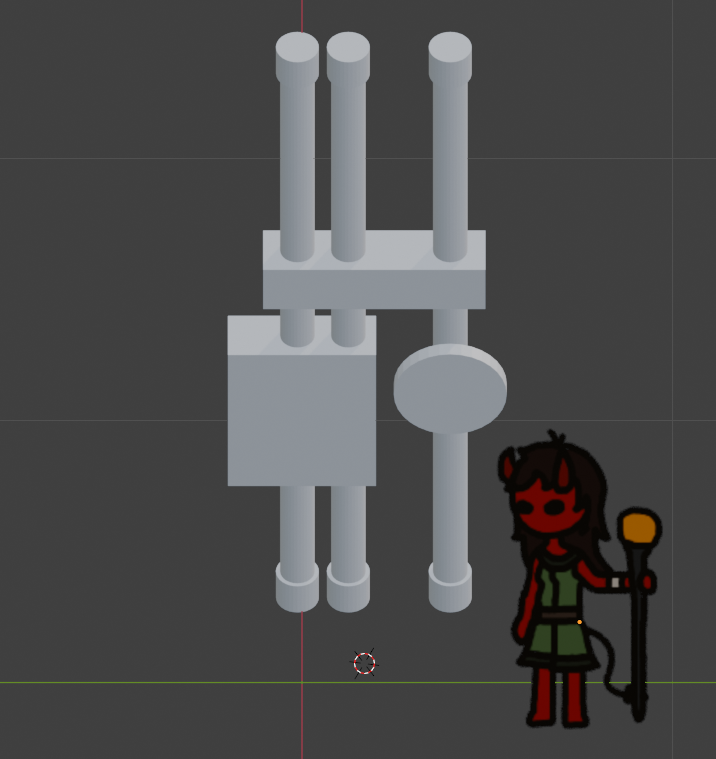
No need to explain the modelling process, this isn't a Blender tutorial! All we need is the basic geometry, we'll fill in the details later.
Do note how it obeys the previously mentioned 1.05 unit height. This is meant to be a 2 unit high piece, to go along the walls, so it is 2.1 units high in Blender. Next, hit Num0 to go to the camera view and take a screenshot.
Now, we paste it into our image editor of choice and begin translating it into a game-ready sprite! How it goes from there depends on the intended art style, but for all intents and purposes I'll describe the process for KatFS's style with thick outlines, basic colors and just a touch of shading.
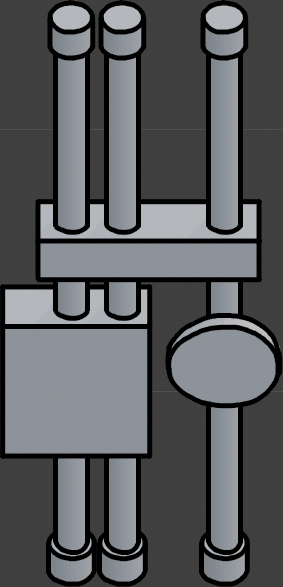
To get started, we trace the 3D object's outlines:
Then, add in missing details like dials, panels and the valve:
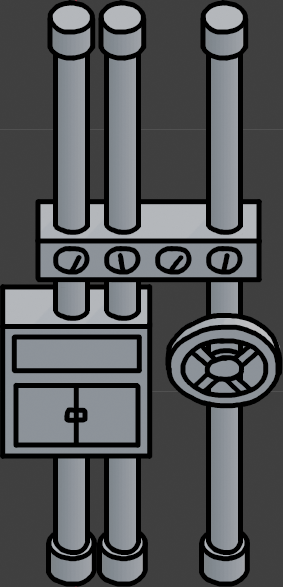
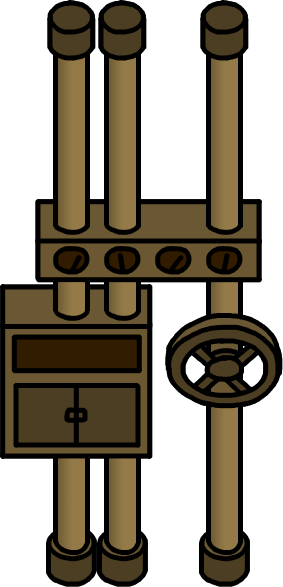
Fill in flat colors:
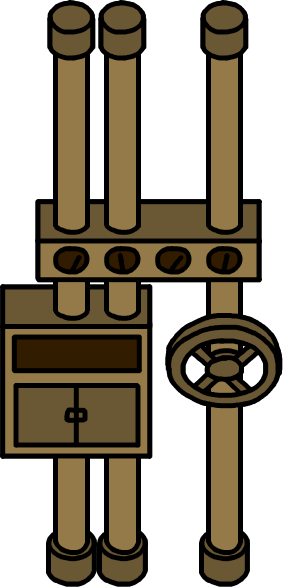
And finally, the touch of shading previously mentioned, with a semi-opaque overlay of black. The 3D model's own shading helps a bunch in this step:
Oh, and as an extra for this asset in particular. An emission layer that will bring these dials and displays to life! It being a separate texture even allows for some fancy tricks like having objects turn on or off, or even having animated displays on these.
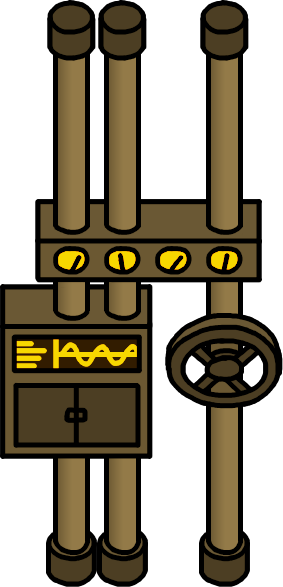
Finally, put it in the game and see how it fits with the rest of the environment.
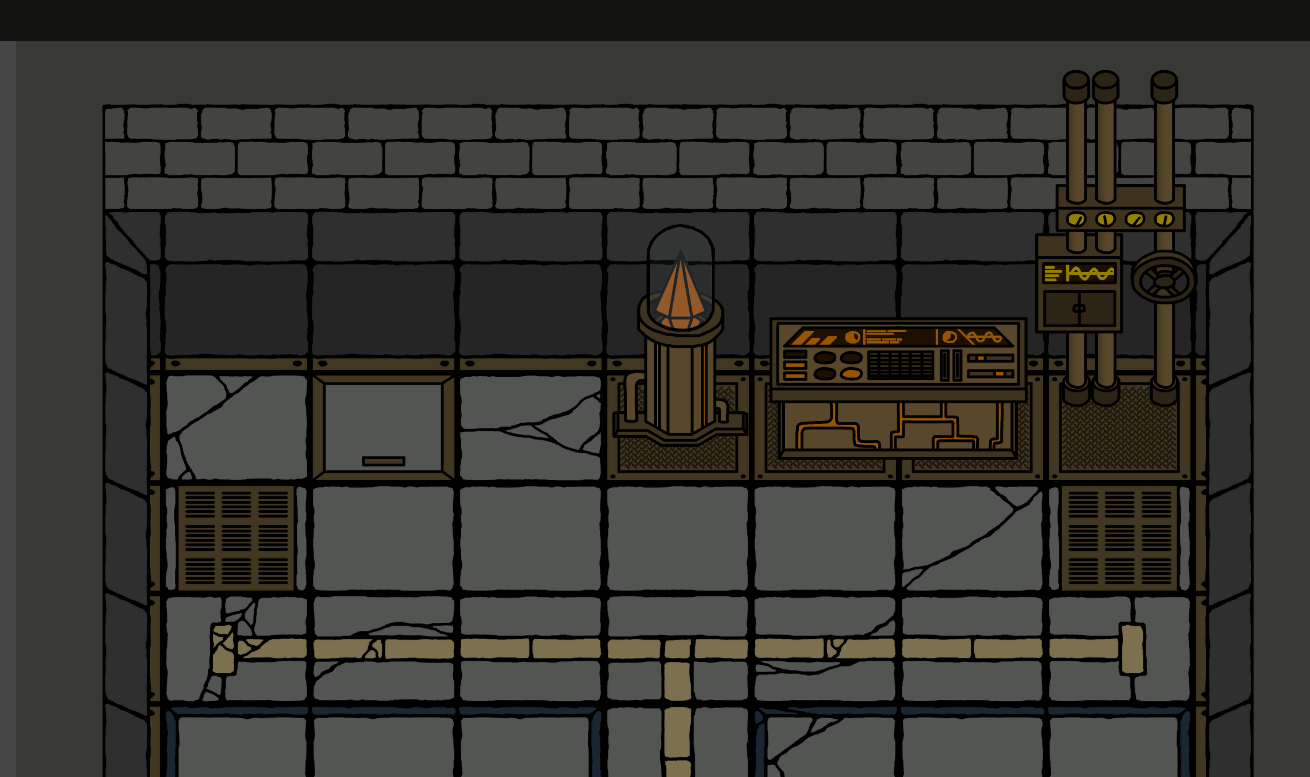
And this is it!
CONCLUSIONS
There's a lot to like about this process. It can be very difficult to maintain a consistent proportionality and perspective across an entire 2D game without some sort of 3D aid, and this method acts as a safeguard against inconsistencies in assets. It also helps greatly with the depiction of more complex shapes and angles.
Having a 3D workspace also does wonders for creativity. We tend to think in 3D, and it can be difficult to iterate upon a design in 2D as you'd have to often throw sketches away and start from scratch over minute details. In a 3D editor, it's a lot easier to iterate and make changes such as rotating elements, changing lengths and adding complex geometry.
There are some situations where this method falls short though. For organic shapes such as plants and characters, it might be too much work to model them only to then redraw them as sprites. However, this opens up an opportunity - I could hire a concept artist that's more experienced with 3D and have them make the models, which I can then redraw in a consistent art style.
That will be it for this devlog, my what a big one this ended up being! See you next time!
Leave a comment
Log in with itch.io to leave a comment.